Python
NumPy | The Absolute Basic for Beginners
Table of Contents
Introduction
Welcome to the absolute beginner’s guide to NumPy, brought to you by codesick.net!
NumPy, short for Numerical Python, stands as an indispensable open-source Python library, extensively employed in scientific and engineering domains. Within the NumPy library, you’ll discover powerful multidimensional array data structures such as the homogeneous, N-dimensional ndarray, and a large library of functions that operate efficiently on these data structures. Dive into the world of NumPy with us at codesick.net and unlock its full potential! Explore more about NumPy’s capabilities, and don’t hesitate to share your feedback or suggestions with us.
Installation
NumPy can be installed using pip, the Python package manager: ‘ pip install numpy ‘.
Pip install numpyAlternatively, for users of Anaconda, NumPy comes pre-installed with the Anaconda distribution.
After installation, NumPy can be imported into Python scripts or interactive sessions using, ‘ import numpy as np ‘.
Import numpy as npArray
An array is a data structure that stores a collection of elements, typically of the same data type, in contiguous memory locations. In programming, arrays are used to store multiple values under a single variable name, making it easier to manage and manipulate large sets of data.
numpy arrays provide additional functionality, memory efficiency, and performance advantages, especially for numerical computing tasks.
Creating Arrays
NumPy arrays are similar to Python lists but more efficient for numerical computations.
Import numpy as npArray Indexing and Slicing
Accessing an array element is the same as array indexing. You can access an array element by referring to its index number.
import numpy as np

arr = np.array([1, 2, 3, 4, 5])

# Indexing
print(arr[0])  # Output: 1
print(arr[-1]) # Output: 5
In python, “slicing” refers to taking elements from one given index to another given index.
We pass slice instead of index like this: [start: end]
import numpy as np

arr = np.array([1, 2, 3, 4, 5])

# Slicing
print(arr[1:4])     # Output: [2 3 4]
print(arr[:4])      # Output: [1 2 3 4]
print(arr[2:])      # Output: [3 4 5]
print(arr[-4:-1])   # Output: [2 3 4]
Array Operations
NumPy allows for element-wise mathematical operations on arrays.
import numpy as np

arr1 = np.array([1, 2, 3])
arr2 = np.array([4, 5, 6])

# Element-wise addition
result = arr1 + arr2  # Output: [5 7 9]
Array Shape and Reshaping
Arrays have a shape attribute indicating the size of each dimension or returns a tuple with each index having the number of corresponding elements.
import numpy as np

arr = np.array([[1, 2, 3], [4, 5, 6], [7, 8, 9]])
print(arr.shape)  # Output: (3,3)
Reshaping means changing the shape of an array.
import numpy as np

arr0 = np.array([1, 2, 3, 4, 5, 6, 7, 8, 9, 10, 11, 12])

#Reshape From 1-D to 2-D
arr1 = arr.reshape(4, 3)
print(arr1)
#Reshape From 1-D to 3-D
arr2 = arr.reshape(2, 2, 3)
print(arr2)
Array Aggregation
NumPy provides functions to aggregate array elements, such as np.sum() and np.mean().
import numpy as np

arr = np.array([[1, 2, 3], [4, 5, 6]])

# Compute sum of all elements
total_sum = np.sum(arr)  # Output: 21
act_mean = np.mean(arr)  # Output: 3.5
Array Concatenation and Splitting
NumPy offers functions to concatenate arrays and split them along specified axes.
import numpy as np
arr1 = np.array([[1, 2], [3, 4]])
arr2 = np.array([[5, 6], [7, 8]])

# Concatenating along rows
newarr1 = np.concatenate((arr1, arr2), axis=0)
print(newarr1)

# Concatenating along columns
newarr2 = np.concatenate((arr1, arr2), axis=1)
print(newarr2)
When splitting along axis 0, the array is divided vertically, creating multiple sub-arrays with the same number of columns.
import numpy as np

# Create a 2D array
arr = np.array([[1, 2, 3],
                [4, 5, 6],
                [7, 8, 9]])

# Split along axis 0 (vertically)
split_result = np.vsplit(arr, 3)

# Output each sub-array
for sub_arr in split_result:
    print(sub_arr)
When splitting along axis 1, the array is divided horizontally, creating multiple sub-arrays with the same number of rows.
import numpy as np

# Create a 2D array
arr = np.array([[1, 2, 3],
                [4, 5, 6],
                [7, 8, 9]])

# Split along axis 1 (horizontally)
split_result = np.hsplit(arr, 3)

# Output each sub-array
for sub_arr in split_result:
    print(sub_arr)
Broadcasting
Broadcasting allows NumPy to perform arithmetic operations on arrays of different shapes.
import numpy as np
arr = np.array([[1, 2, 3], [4, 5, 6]])
scalar = 2

# Broadcasting scalar to array
result = arr * scalar  # Output: [[ 2  4  6] [ 8 10 12]]
Conclusion
NumPy provides a powerful foundation for numerical computing in Python.
Mastering NumPy’s basics is essential for anyone working with data or scientific computing in Python.
Python
Setting Up Python on Your Desktop in 2 Simple Steps | Python Programming

Table of Contents
This series is about programming computers with Python. You could read this article from cover to cover without ever touching a keyboard, but you’d miss out on the fun part—coding! To get the most out of this series, you need a computer with Python installed on it and a way to create, edit, and save Python code files.
In this chapter, you’ll learn how to:
• Install the latest version of Python 3 on your computer
• Open IDLE, Python’s built-in Integrated Development and Learning Environment
Let’s get started!
A Note on Python Versions
Many operating systems, including macOS and Linux, come with Python preinstalled. The version of Python that comes with your operating system is called the system Python.
IMPORTANT
“Do not attempt to uninstall the system Python!”
This chapter demonstrates how to install the latest Python 3 version alongside any existing Python system on your computer.
This chapter is split into three sections: Windows, macOS, and Ubuntu Linux. Find the section for your operating system and follow the steps to get set up, then skip ahead to the next chapter.
If you have a different operating system, then check out “Python 3 Installation & Setup Guide” to see if your OS is covered.
Windows
Follow these steps to install Python 3 and open IDLE on Windows.
IMPORTANT
“The code in this chapter is tested only against Python installed as described in this section. Be aware that if you have installed Python through some other means, such as Anaconda Python, you may encounter problems when running some of the code examples!”
Install Python
Windows doesn’t typically come with a system Python. Fortunately, installation involves little more than downloading and running the Python installer from the Python.org website.
Step 1: Download the Python 3 Installer
Open a web browser and navigate to the following URL:
https://www.python.org/downloads/windows/
Click Latest Python 3 Release – Python 3.x.x located beneath the “Python Releases for Windows” heading near the top of the page. As of this writing, the latest version was Python 3.12.
Then scroll to the bottom and click Windows x86-64 executable installer to start the download.
Note “If your system has a 32-bit processor, then you should choose the 32-bit installer. If you aren’t sure if your computer is 32-bit or 64-bit, stick with the 64-bit installer mentioned above.”
Step 2: Run the Installer
Open your Downloads folder in Windows Explorer and double-click the file to run the installer. A dialog that looks like the following one will appear:
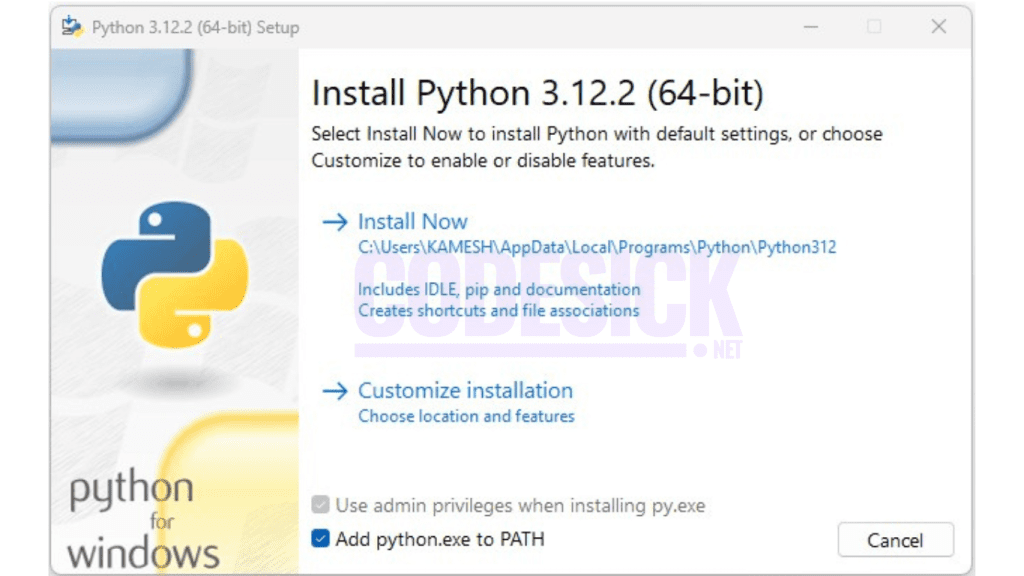

The Python version you see is acceptable if it’s greater than 3.12.2, as long as it’s not less than 3.
IMPORTANT
“Make sure you select the box that says Add Python 3.x to PATH. If you install Python without selecting this box, then you can run the installer again and select it.”
Click Install Now to install Python 3. Wait for the installation to finish, then continue to open IDLE.
Open IDLE
You can open IDLE in two steps:
1. Click the Start menu and locate the Python 3.12 folder.
2. Open the folder and select IDLE (Python 3.12).
IDLE opens a Python shell in a new window. The Python shell is an interactive environment that allows you to type in Python code and execute it immediately. It’s a great way to get started with Python!
The Python shell window looks like this:
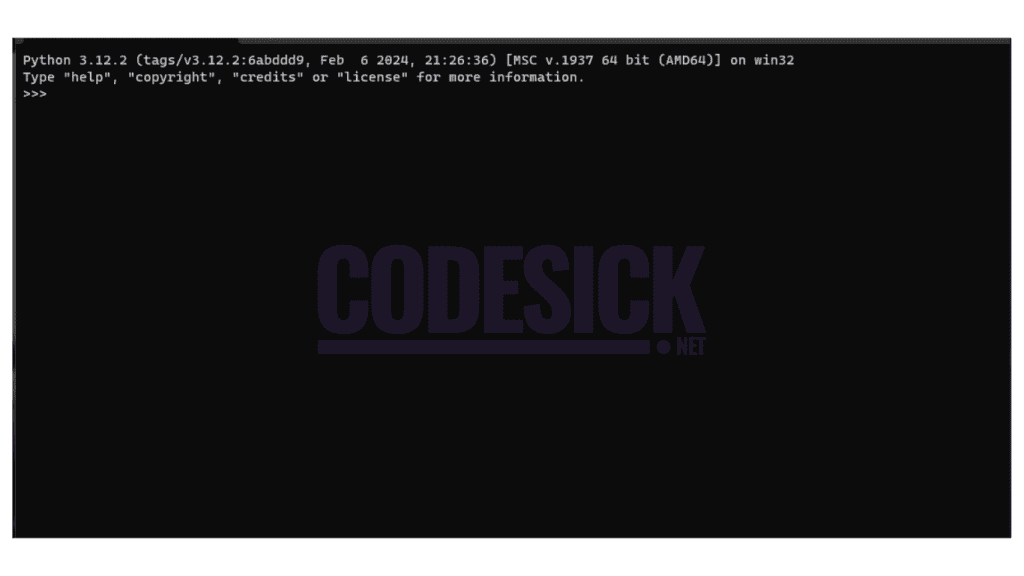

The Python version and operating system information are displayed at the top of the window. If Python version is less than or greater 3.12, follow the previous installation instructions.
Now that you have Python installed, let’s get straight into writing your first Python program!
macOS
Follow these steps to install Python 3 and open IDLE on macOS.
IMPORTANT
“The code in this chapter is tested only against Python installed as described in this section. Be aware that if you have installed Python through some other means, such as Anaconda Python, you may encounter problems when running some of the code examples!”
Install Python
Windows doesn’t typically come with a system Python. Fortunately, installation involves little more than downloading and running the Python installer from the Python.org website.
Step 1: Download the Python 3 Installer
Open a web browser and navigate to the following URL:
https://www.python.org/downloads/windows/
Click Latest Python 3 Release – Python 3.x.x located beneath the “Python Releases for Windows” heading near the top of the page. As of this writing, the latest version was Python 3.12.
Then scroll to the bottom and click Windows x86-64 executable installer to start the download.
Step 2: Run the Installer
Open your Downloads folder in Windows Explorer and double-click the file to run the installer. A dialog that looks like the following one will appear:
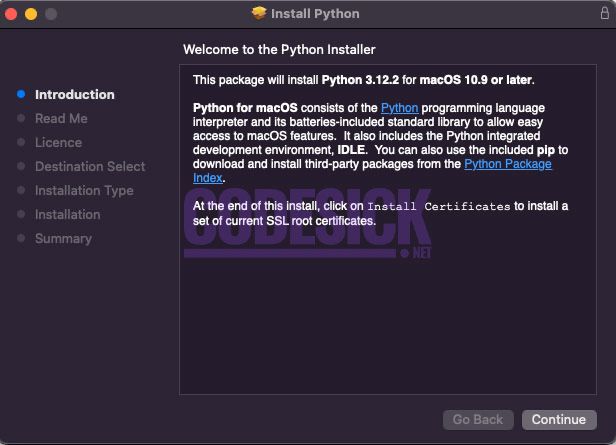

Press Continue a few times until you are asked to agree to the software license agreement. Then click Agree. You’ll be shown a window that tells you where Python will be installed and how much space it will take. You most likely don’t want to change the default location, so go ahead and click Install to start the installation.
When the installer is finished copying files, click Close to close the installer window.
Open IDLE
You can open IDLE in three steps:
1. Open Finder and click Applications.
2. Double-click the Python 3.12 folder.
3. Double-click the IDLE icon.
IDLE opens a Python shell in a new window. The Python shell is an interactive environment that allows you to type in Python code and execute it immediately. It’s a great way to get started with Python!
The Python shell window looks like this:
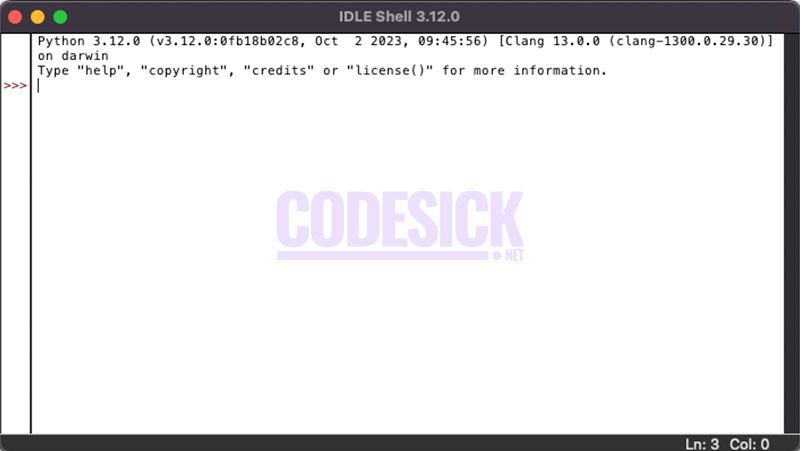

The Python version and operating system information are displayed at the top of the window. If Python version is less than or greater 3.12, follow the previous installation instructions.
Now that you have Python installed, let’s get straight into writing your first Python program!
Ubuntu Linux
Follow these steps to install Python 3 and open IDLE on Ubuntu Linux.
IMPORTANT
“The code in this chapter is tested only against Python installed as described in this section. Be aware that if you have installed Python through some other means, such as Anaconda Python, you may encounter problems when running some of the code examples!”
Install Python
There’s a good chance that your Ubuntu distribution already has Python installed, but it probably won’t be the latest version, and it may be Python 2 instead of Python 3. To find out what version(s) you have, open a terminal window and try the following commands:
$ python --version

$ python3 --version
One or more of these commands should respond with a version, as below:
$ python3 --version
To install Python on Ubuntu, determine your local version by running the command:
$ lsb_release -a

No LSB modules are available.

Distributor ID:                 Ubuntu

Ubuntu Description:             Ubuntu 18.04.1 LTS

Release:                        18.04

Codename:                       bionic
Look at the version number next to Release in the console output and follow the corresponding instructions below.
Ubuntu 18.04 or Greater
Ubuntu 18.04 does not automatically include Python 3.12, but it can be installed using the following commands in the Terminal application.
$ sudo apt-get update

$ sudo apt-get install python3.12 idle-python3.12 python3-pip
Note that because the Universe repository is usually behind the Python release schedule, you may not get the latest version of Python 3.12. However, any version of Python 3.12 will work for this chapter.
Ubuntu 17 and Lower
For Ubuntu versions 17 and lower, Python 3.12 is not in the Universe repository. You need to get it from a Personal Package Archive (PPA). To install Python from the deadsnakes PPA, run the following commands in the Terminal application.
$ sudo add-apt-repository ppa:deadsnakes/ppa

$ sudo apt-get update

$ sudo apt-get install python3.12 idle-python3.12 python3-pip
You can check that the correct version of Python was installed by running python3 –version. If you see a version number less than 3.12, then you may need to type python3.12 –version. Now you can open IDLE and get ready to write your first Python program.
Open IDLE
You can open IDLE from the command line by typing the following:
$ idle-python3.12On some Linux installations, you can open IDLE with the following shortened command:
$ idle3IDLE opens a Python shell in a new window. The Python shell is an interactive environment that allows you to type in Python code and execute it immediately. It’s a great way to get started with Python!
The Python shell window looks like this:
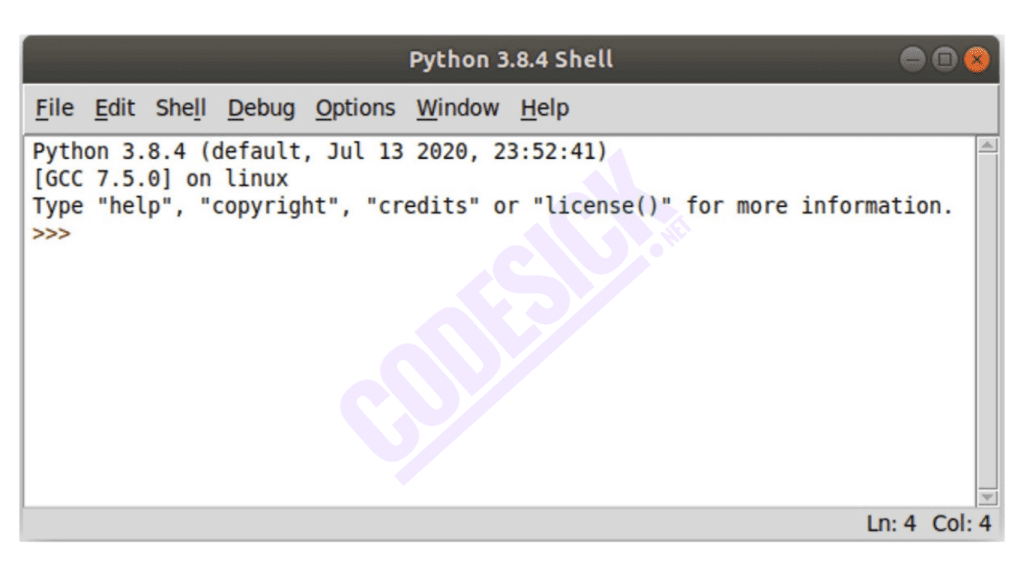

The Python version and operating system information are displayed at the top of the window. If Python version is less than or greater 3.12, follow the previous installation instructions.
Now that you have Python installed, let’s get straight into writing your first Python program!
Go ahead and move on to chapter 3.
Python
Getting Started with Python | A Beginner’s Guide

Table of Contents
Introduction
Welcome to Codesick, fully updated for Python in this series, you’ll learn real-world Python programming techniques, illustrated with useful and interesting examples. Whether you’re a new programmer or a professional software developer looking to dive into a new language, this series will teach you all the practical Python that you need to get started on projects of your own. No matter what your ultimate goals may be, if you work with a computer at all, then you’ll soon be finding endless ways to improve your life by automating tasks and solving problems through Python programs that you create.
What Is Python?
Python is a high-level, interpreted, and general-purpose programming language. It was created by Guido van Rossum and first released in 1991. Python is known for its simplicity, readability, and versatility, making it a popular choice for beginners and experienced developers alike. Here are some key characteristics and features of Python.
- High-level Language:
Python is a high-level programming language, meaning it abstracts many low-level details and provides a clean and simple syntax.
- Interpreted Language:
Python is an interpreted language, which means that the Python code is executed line by line by an interpreter, rather than being compiled into machine code beforehand.
- Object-Oriented:
Python supports object-oriented programming (OOP) principles, allowing developers to organize code using classes and objects.
- Readable and Expressive Syntax:
Python emphasizes readability with a clean and straightforward syntax. This reduces the cost of program maintenance and development.
- Extensive Standard Library:
Python comes with a comprehensive standard library that provides modules and packages for various tasks, simplifying development by offering pre-built functionality.
- Dynamic Typing:
Python is dynamically typed, meaning the data type of a variable is determined at runtime. This allows for more flexibility but requires careful handling of data types.
- Cross-Platform Compatibility:
Python is cross-platform, meaning code written in Python can run on different operating systems with little to no modification.
- Community Support:
Python has a large and active community of developers, contributing to its rich ecosystem of libraries, frameworks, and tools. This community support makes it easier to find solutions and resources.
- Open Source:
Python is an open-source language, which means its source code is freely available for modification and redistribution.
What Is Python Used For?
Python is the fourth most popular programming language, according to Stack Overflow’s 2022 Developer Survey, with respondents stating that they use it for development work over 50% of the time. Python is frequently used for data analysis, data visualization, task automation, and the development of software and websites. Python is widely used by non-programmers, including scientists and accountants, for a variety of everyday tasks, like organizing finances.
- Web Development:
Frameworks: Python has powerful web development frameworks like Django and Flask that enable developers to build scalable and robust web applications.
- Data Science and Machine Learning:
Libraries: Python is a dominant language in data science and machine learning with libraries like NumPy, Pandas, Matplotlib, Seaborn, scikit-learn, TensorFlow, and PyTorch.
- Artificial Intelligence (AI) and Natural Language Processing (NLP):
Libraries: Python is widely used for AI and NLP tasks with libraries such as NLTK, spaCy, and Gensim.
- Automation and Scripting:
Task Automation: Python is used for automating repetitive tasks, handling files, and system operations due to its simplicity and readability.
- Desktop Applications:
GUI Development: Python can be employed for creating desktop applications with graphical user interfaces (GUIs) using libraries like Tkinter or PyQt.
- Cybersecurity:
Penetration Testing: Python is widely used for penetration testing and developing scripts for cybersecurity tasks.
- Scientific and Numeric Computing:
SciPy: Python is employed for scientific computing, simulations, and mathematical modeling using libraries like SciPy.
Why is Python so popular?
- Simple Syntax:
Python’s syntax is designed to be readable and concise, resembling natural language. This simplicity makes it easier for both beginners and experienced developers to understand and write code quickly.
- Versatility:
Python is a versatile language that can be applied to various domains, including web development, data science, machine learning, artificial intelligence, automation, scripting, and more. Its adaptability makes it a go-to choose for a wide range of projects.
- Beginner-Friendly:
Python is known for its beginner-friendly nature. The syntax is clear and easy to grasp, making it an excellent language for individuals who are new to programming.
- Open Source:
Python is an open-source programming language, which means it is freely available for use, distribution, and modification.
- Rich Ecosystem of Libraries:
Python has an extensive collection of modules and libraries, offering pre-built solutions for various tasks. These libraries, such as NumPy, Pandas, TensorFlow, and Django, contribute to the language’s functionality and efficiency.
- Active Community:
Python has a large and active community of developers who contribute to forums, discussion groups, and collaborative projects. Community support provides a valuable resource for problem-solving, knowledge sharing, and continuous learning. It also ensures that the language remains up-to-date and relevant.
- Ease of Learning and Teaching:
Python’s simplicity not only makes it easy for beginners to learn but also facilitates effective teaching. It is commonly used in educational settings to introduce programming concepts due to its readability and straightforward syntax.
Learning by Doing
This series is all about learning by doing, so be sure to actually type in the code snippets you encounter in the article. For best results, we recommend that you avoid copying and pasting the code examples. You’ll learn the concepts better and pick up the syntax faster if you type out each line of code yourself. Plus, if you screw up which is totally normal and happens to all developers on a daily basis the simple act of correcting typos will help you learn how to debug your code.
The next chapter is about how to set it up in Python on your desktop.
-




 Python3 months ago
Getting Started with Python | A Beginner’s Guide
-


 React.js3 months ago
Start Your React Journey | A Step-by-Step Guide.
-


 React.js3 months ago
How to Use Props in React for beginners
-


 React.js3 months ago
ReactJS Components | Type, Nesting, and Lifecycle for beginners
-


 React.js3 months ago
ReactJS State | SetState, Props and State Explained for beginners
-


 React.js3 months ago
React with Express JS | Understanding the Basics
-


 Flutter2 months ago
Understanding Dart Basics | Flutter Tutorial
-


 React.js3 months ago
React With Redux | Understanding the Basics

