Flutter
Setting Up Flutter Development Environment
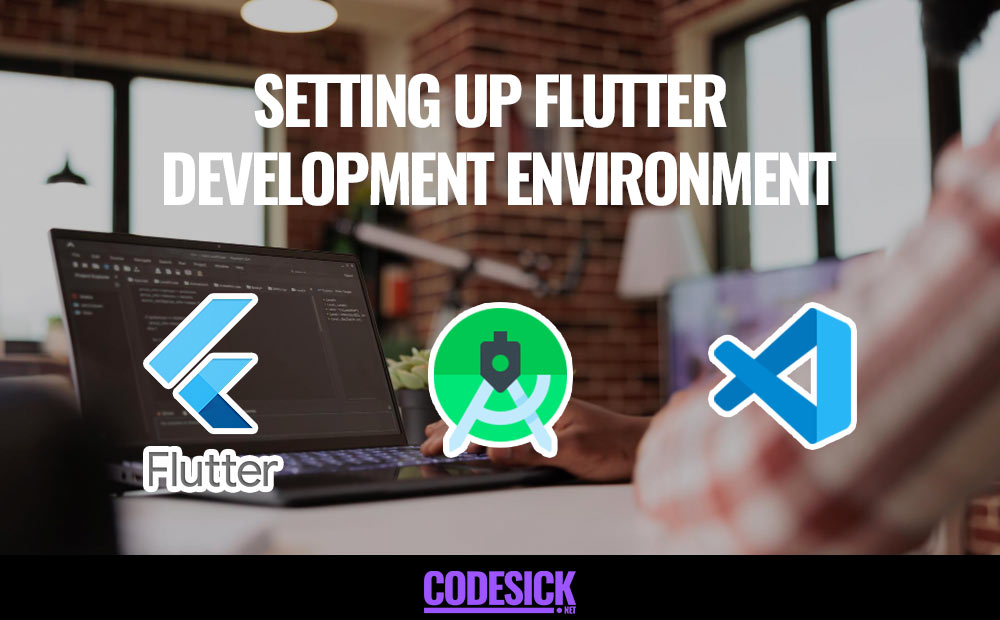
Table of Contents
- Installing Flutter SDK
- Setting Up an IDE for Flutter Development
- Configuring Flutter for Development
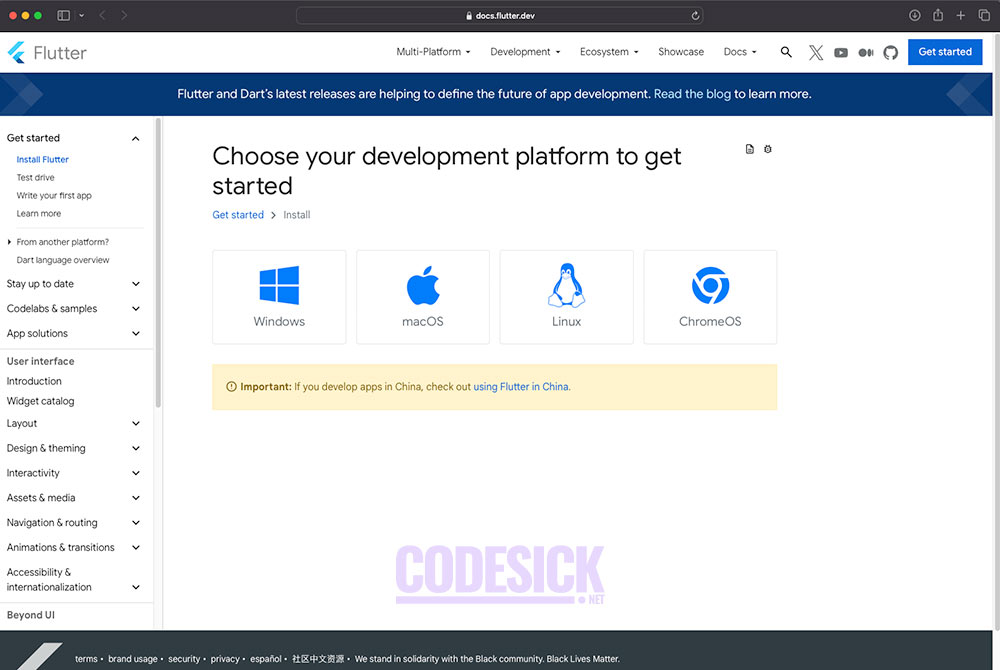
Setting up your development environment for Flutter is pretty straightforward. First off, make sure your computer meets Flutter’s requirements, which vary depending on whether you’re using Windows, macOS, or Linux. Then, head over to the Flutter website and download the Flutter SDK. Once you’ve got it downloaded, extract the files and add the Flutter bin directory to your system path. If you’re planning to develop for Android, it’s a good idea to install Android Studio, and if you’re on a Mac and want to develop for iOS, you’ll need Xcode. Make sure you set up an emulator or simulator for testing your apps, or you can connect a physical device if you prefer. After all that, run flutter doctor in your terminal or command prompt to check everything’s set up correctly. And that’s it! You’re all set to start building awesome Flutter apps.
System Requirements
- Operating System: macOS 10.14 (Mojave) or later, Windows 64-bit, or Linux 64-bit
- Disk Space: 2.8 GB (not including IDE/tools)
- Tools: Git, Flutter SDK
Installing Flutter SDK
Windows
- Download: Head to the official Flutter website, Download Flutter “Stable Channel” bundle for Windows.
- Install: Run the downloaded installer (e.g.,
flutter_windows_stable.zip) and follow the on-screen instructions. Choose a location where you want to install Flutter (e.g.,C:\flutter). - Add to Path: You need to add the Flutter installation directory to your system’s PATH environment variable. This allows you to run Flutter commands from any terminal. Follow these steps:
- Right-click on “This PC” (or “My Computer”) and select “Properties”.
- Go to “Advanced system settings” and then click on the “Environment Variables” button.
- Under “System variables”, find the “Path” variable and click “Edit”.
- Click “New” and add the path to your Flutter installation directory (e.g.,
C:\flutter\bin). - Click “OK” on all open windows to save the changes.
- Verify: Open a new terminal window and type
flutter doctor. This command should show you a list of dependencies and their status. If everything is installed correctly, you should see green checkmarks next to all items.
Mac
- Download: Go to the Flutter website and Download Flutter “Stable Channel” bundle for macOS.
- Extract: Double-click the downloaded
.zipfile to extract the Flutter files. This might create a folder named “flutter” on your desktop. - Move: Move the extracted “flutter” folder to a desired location, preferably somewhere outside your user directory (e.g.,
/codesick/flutter). - Add to Path: Open your terminal and run the following command to add Flutter to your PATH:
echo 'export PATH=$PATH:/codesick/flutter/bin' >> ~/.zshrc
Replace /codesick/flutter with the actual path where you moved the Flutter folder.
5. Reload: Source your shell configuration for the changes to take effect:
source ~/.zshrc
- Verify: Run
flutter doctorin your terminal. You should see green checkmarks indicating successful installation.
Linux
- Download: Choose your preferred installation method (snap, manual, etc.) from the Flutter website. We’ll focus on the manual method here.
- Download: Download the “Stable Channel” bundle for your Linux distribution.
- Extract: Extract the downloaded
.tar.xzfile to a desired location (e.g.,/codesick/flutter). - Add to Path: Open your terminal and edit your shell configuration file (e.g.,
.bashrcfor Bash). Add the following line, replacing/codesick/flutterwith the actual path:
export PATH=$PATH:/codesick/flutter/bin
- Reload: Source your shell configuration for the changes to take effect:
source ~/.bashrc
- Verify: Run
flutter doctorin your terminal. You should see green checkmarks confirming the installation.
Setting Up an IDE for Flutter Development
Android Studio
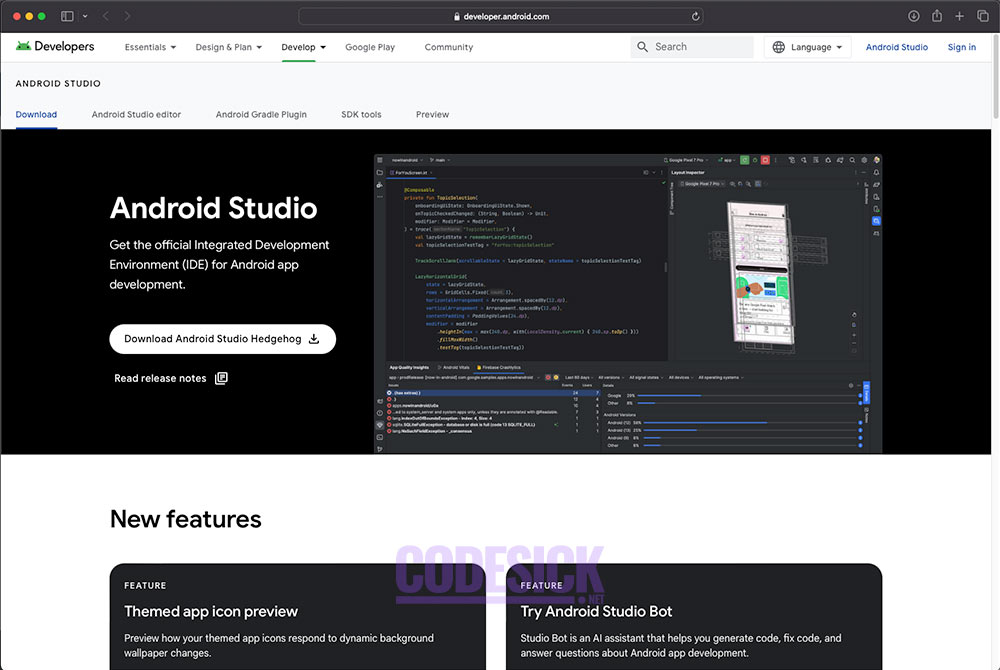
- Download and Install: Download Android Studio from the official website and follow the installation instructions.
- Install Flutter Plugin:
- Open Android Studio.
- Go to File > Settings (or Android Studio > Preferences on macOS).
- Search for “Flutter” in the Marketplace tab.
- Click “Install” and restart Android Studio.
- Create a New Flutter Project:
- Click on “New Flutter Project” in the Welcome window or select File > New > New Flutter Project from the main menu.
- Follow the prompts to specify your project name, location, and desired features.
Visual Studio Code
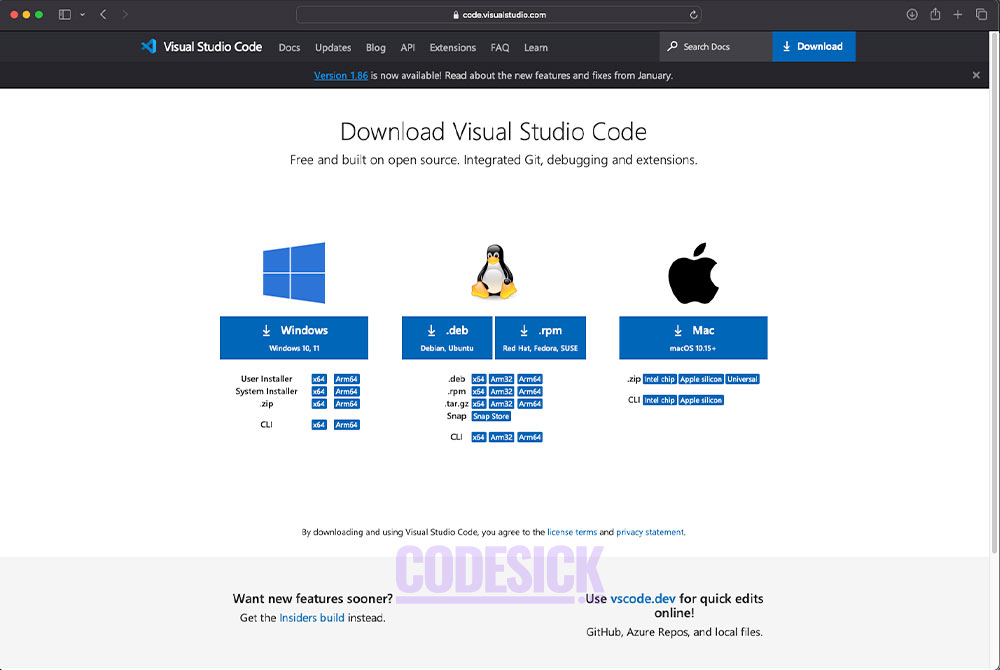
- Download and Install: Download Visual Studio Code from the official website and follow the installation instructions.
- Install Flutter Extension:
- Open Visual Studio Code.
- Go to the Extensions tab (Ctrl+Shift+X).
- Search for “Flutter” in the Marketplace.
- Click “Install” and follow the setup instructions.
- Create a New Flutter Project:
- Go to the Command Palette (Ctrl+Shift+P) and type “Flutter: New Project”.
- Select “Flutter: New Application” and follow the prompts to define your project details.
Configuring Flutter for Development
- Pick a Device or Emulator:
- If you have a phone or tablet, plug it into your computer and turn on developer mode. You can find out how to do this on the Android or iOS websites.
- If you don’t have a physical device, you can use a virtual one. You can get an Android emulator from Android Studio or an iOS simulator from Xcode.
- Connect to Your Device or Emulator:
- Make sure your coding program (IDE) can see and talk to your device or emulator. For Android, this might mean turning on USB debugging. For iOS, you’ll need to start the simulator using Xcode.
- Set Up Your Project:
- If you’re making an Android app, you can adjust settings like which version of Android it works with and how it’s built in Android Studio.
- If you’re making an iOS app, you’ll do this in Xcode. You can set things like what the app icon looks like, how it’s signed, and what versions of iOS it runs on.


Table of Contents
- Creating Your First Flutter Project
- Understanding Flutter Project Structure
- Running on Emulator or Device
Creating Your First Flutter Project
Welcome to the exciting world of Flutter development! We’re about to embark on a journey where you’ll build your very first Flutter project. Buckle up, because this is going to be a thrilling ride filled with learning, creating, and seeing your ideas come to life on the screen.
Here’s your trusty guide to help you navigate this adventure
Step 1: Install Flutter
- Visit the Flutter website and download the latest stable version of Flutter for your operating system (Windows, macOS, or Linux).
- Extract the downloaded file to a location on your computer.
- Add the Flutter
bindirectory to your system’s PATH variable.
Step 2: Set up an IDE
You can use any text editor or IDE for Flutter development, but popular choices include:
- Android Studio / IntelliJ: Install the Flutter and Dart plugins from the plugin marketplace.
- Visual Studio Code (VS Code): Install the Flutter and Dart extensions from the VS Code marketplace.
Step 3: Verify Flutter installation
Open a terminal or command prompt and run
flutter doctorThis command will check your environment and provide feedback on what is missing or needs to be configured.
In our article on Setting Up Flutter Development Environment, we’ve got you covered with clear guidance on those first three steps we just talked about. We’ve made it super easy to understand, so you won’t feel lost. Just give it a read, and you’ll be all set to dive into Flutter development!
Step 4: Create a new Flutter project
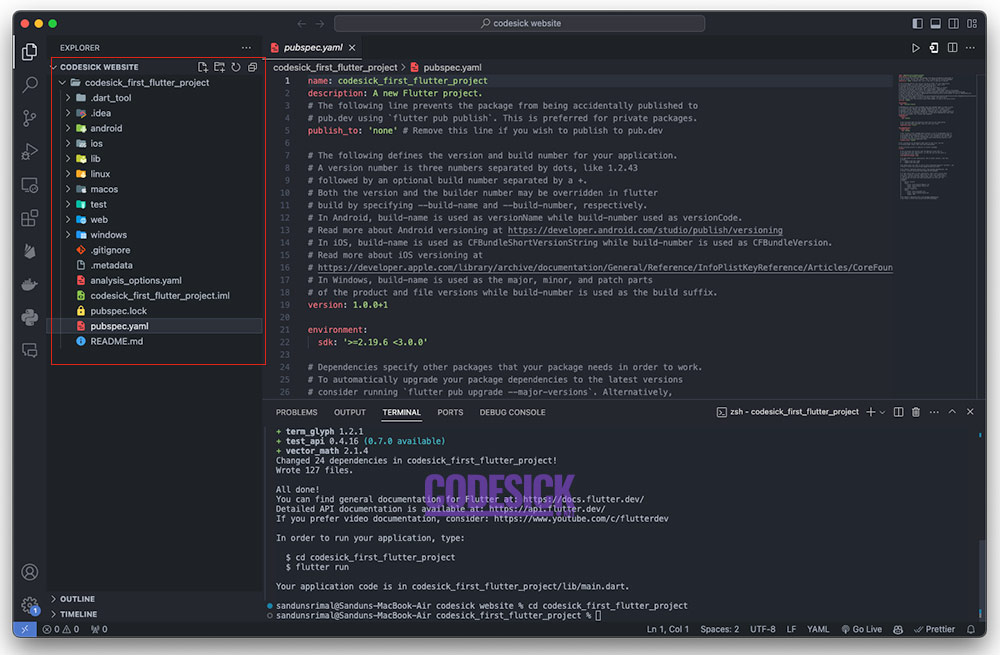
Run the following command in your terminal or command prompt to create a new Flutter project:
flutter create codesick_first_flutter_projectReplace codesick_first_flutter_project with the name you want to give to your project.
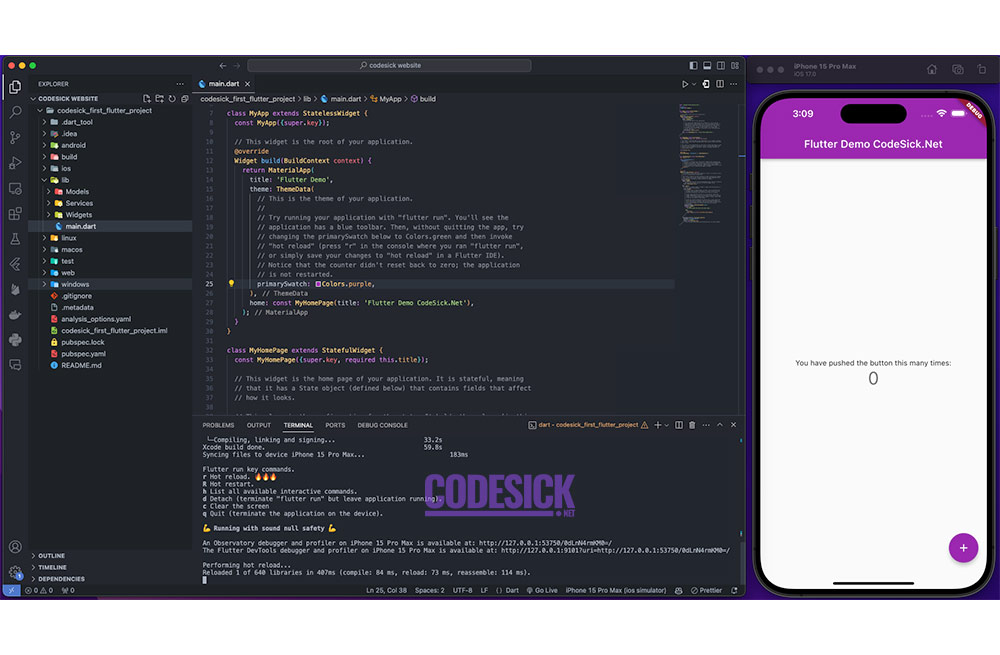
Step 5: Run your Flutter project
Navigate to your project directory:
cd codesick_first_flutter_projectRun your Flutter project using:
flutter runThis command will compile your Flutter code and launch the app on your connected device or emulator.
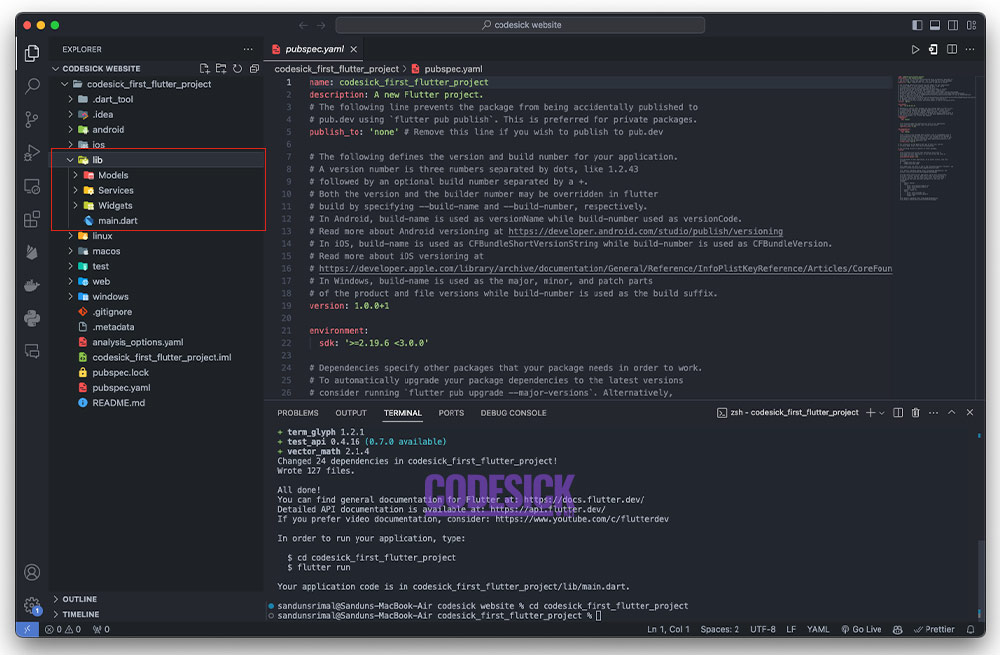
Understanding Flutter Project Structure
Congratulations on creating your first Flutter project! Now, let’s delve deeper and understand the hidden organization within its structure. This structure is designed to keep your project organized and scalable, making it easier to navigate and maintain as your app grows.
Think of it like a well-organized toolbox
- The Toolbox (Project Root): This is the main directory that holds everything related to your project.
- The Compartments (Directories): Inside the toolbox, you’ll find various compartments, each with a specific purpose:
- lib: This is the heart and soul of your app, containing all your custom code, widgets, and logic. Think of it as the blueprints for your app’s functionality.
- pubspec.yaml: Imagine this as the instruction manual for your toolbox. It specifies all the external tools (dependencies) your app needs, like additional libraries and packages.
- assets: This compartment stores all the visual elements your app uses, such as images, fonts, and icons. Think of it as the paint and brushes for your app’s design.
- test: This section is dedicated to creating test cases to ensure your app functions as expected. It’s like having a quality control check for your project.
- (Optional) Other directories: Depending on your project’s complexity, you might have additional directories like
androidandiosfor platform-specific code, or custom folders for specific features or functionalities.
Delving Deeper into the lib directory
The lib directory is like your personal workshop, where the real magic happens. Here’s a closer look at some key elements you might find inside:
- main.dart: This is the main entry point for your app. It’s like the ignition switch, responsible for starting and configuring your entire application.
- Widgets: These are the building blocks of your app’s UI, representing various visual elements like buttons, text fields, and containers. You can create custom widgets or use pre-built ones from Flutter’s rich library.
- Models: If your app deals with data (e.g., user information, product details), you might have models defined here. These represent the structure and properties of your data.
- Services: This compartment might house code for interacting with external services like APIs or databases. Imagine it as the tools you use to communicate with the outside world.
Running on Emulator or Device
It’s time to see your creation come alive! Now that you’ve built your first Flutter project, let’s explore how to run it on either an emulator (simulated device) or your physical device.
Emulator
This is a software program that mimics the behavior of a real device on your computer. It’s a convenient option for quick testing and development, especially when trying out different Android versions or screen sizes.
Gearing Up for Launch
- Connect your development environment: Make sure your editor or IDE (like Android Studio or Visual Studio Code) is connected to the Flutter SDK.
- Launch the emulator: In your editor or IDE, look for the “run” or “debug” option (usually a play button icon). Select the desired emulator configuration (e.g., Android version, screen size) and hit “Run.”
- Wait and witness: Flutter will build and deploy your app to the chosen emulator. This might take a few moments.
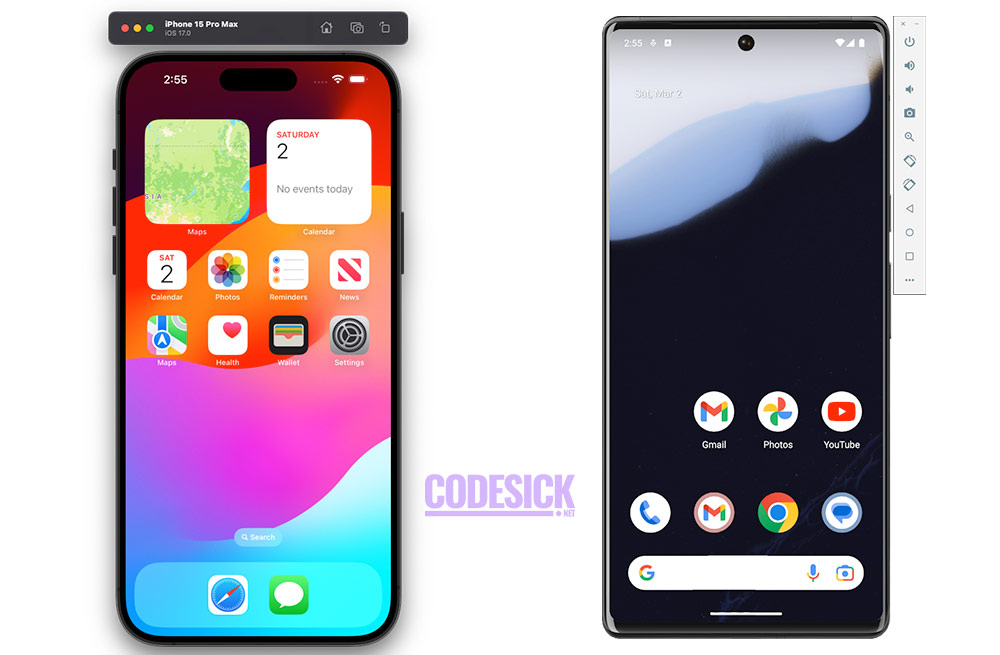
Physical Device
Running your app on an actual device provides the most realistic testing experience. It allows you to see how your app interacts with the hardware and real-world conditions.
Gearing Up for Launch
- Enable Developer Options: On your device, navigate to the settings and search for “Developer Options.” Enable this option and turn on “USB Debugging.”
- Connect your device: Use a USB cable to connect your device to your computer.
- Run your app: Similar to the emulator, launch your editor or IDE and choose “Run” or “Debug.” Select your connected device as the target and hit “Run.”
Congratulations! You’ve successfully launched your Flutter app on either an emulator or your physical device. Now you can interact with your creation, test its functionality, and see your app come to life in a real-world environment. As you delve deeper into Flutter development, you’ll discover even more advanced techniques for building and testing your apps, but this initial experience is a significant step in your journey!
Table of Contents
- Introduction to Dart programming language
- Data Types and Variables in Dart Programming
- Control Flow and Loops in Dart Programming
- Functions and Classes in Dart Programming
Imagine a programming language that’s powerful yet friendly, designed for building beautiful and efficient apps that work on any device. That’s Dart in a nutshell! It’s like the Swiss Army knife of app development, and understanding its basics is your first step to creating amazing things.
Introduction to Dart programming language
Dart is a programming language that’s used to build applications, especially for the web and mobile devices. It’s known for being fast, efficient, and easy to learn.
It is a modern language developed by Google, specifically for building high-performance apps. Think of it as the building blocks for your app’s brain and brawn. It is object-oriented, meaning you can organize your code into reusable chunks called “objects,” making things clean and manageable. It is strongly typed, which means it helps you catch errors early on, preventing nasty bugs from sneaking in. It is cross-platform, meaning you can write code once and use it to build apps for mobile, web, and even desktop. No more rewriting everything for each platform.
Now, let’s explore some of the core Dart concepts you’ll encounter,
In Dart programming, you’ll encounter several core concepts that form the foundation of your code,
- Variables: These are like containers that hold information your program needs. They can store numbers, text, or even more complex data like lists.
- Operators: Think of operators as the tools you use to work with your data. They allow you to perform actions like adding numbers, comparing values, or displaying information on the screen.
- Control Flow: This concept guides how your program behaves in different situations. It involves using instructions like “if” statements and loops to direct the flow of your code.
- Functions: Functions are reusable blocks of code that perform specific tasks. They help keep your code organized and clean by allowing you to encapsulate functionality into separate units.
- Classes: Classes serve as blueprints for creating objects. They define the properties (data) and methods (functions) that objects of that class will have. You can think of them as templates for creating objects with predefined behaviors and characteristics.
But wait, there’s more! Dart also has some cool features that make it stand out,
- Hot Reload: This lets you see changes you make to your code reflected in your app instantly, without restarting everything. It’s like having a magic refresh button for your app development!
- Null Safety: This helps prevent errors caused by missing values, making your code more robust and reliable. It’s like having a safety net for your data!
Remember, this is just a taste of the Dart world! There’s much more to explore, but with this basic understanding, you’re well on your way to building amazing things. So, grab your coding hat and start your Dart adventure!
Data Types and Variables in Dart Programming
Now You know about Dart, let’s explore its kitchen, In any good kitchen, you have different ingredients for different dishes. In Dart, these ingredients are called data types, and you use them to store information in your code.
Data types and variables are fundamental concepts in programming. Let’s break them down,
Data Types in Dart
Data types define the type of data that can be stored and manipulated in a programming language. Dart, like many programming languages, supports various data types, including,
- Numbers: Integers (whole numbers) and doubles (decimal numbers).
- Strings: Sequences of characters, such as letters, numbers, and symbols.
- Booleans: Represents true or false values.
- Lists: Ordered collections of objects.
- Maps: Key-value pairs where each key maps to a value.
- Sets: Unordered collections of unique objects.
Variables in Dart
Variables are containers used to store data values. They act as placeholders that can be assigned different values during the execution of a program. In Dart, variables are declared using the var, final, or const keywords,
var: Declares a variable with a dynamic type that can change.final: Declares a variable whose value cannot be changed once assigned. It’s like a constant.const: Declares a compile-time constant. The value must be known at compile-time.
For example, in Dart, you could declare a variable name of type String and assign it a value like this:
var name = 'John';Or, you could declare a constant pi of type double like this:
const double pi = 3.14;Understanding data types and variables is crucial for effectively storing, manipulating, and managing data in a Dart program.
Control Flow and Loops in Dart Programming
Imagine you’re building a game. You want your character to move, jump, and collect coins. How do you tell your Dart program what to do in each situation? That’s where control flow and loops come in,
Control Flow in Dart
Control flow refers to the order in which statements in a program are executed. It allows you to make decisions and execute specific blocks of code based on conditions. In Dart, common control flow structures include,
If Statements: These allow you to execute a block of code if a certain condition is true. You can also use else to execute a different block of code when the condition is false.
if (condition) {
    // Code to execute if condition is true
} else {
    // Code to execute if condition is false
}
Switch Statements: These provide a way to select one of many code blocks to be executed. It’s useful when you have multiple conditions to check against a single value.
switch (value) {
    case 1:
        // Code to execute if value is 1
        break;
    case 2:
        // Code to execute if value is 2
        break;
    default:
        // Code to execute if value doesn't match any case
}
Loops in Dart
Loops are used to execute a block of code repeatedly. They help in reducing redundancy and writing more concise code. Here are the types of loops in Dart,
For Loop: Executes a block of code a fixed number of times.
for (initialization; condition; increment/decrement) {
    // Code to execute
}
While Loop: Executes a block of code as long as a specified condition is true.
while (condition) {
    // Code to execute
}
Do-While Loop: Similar to a while loop, but the code block is executed at least once before the condition is evaluated.
do {
    // Code to execute
} while (condition);
With control flow and loops, you can make your Dart app dynamic and interactive!.
Functions and Classes in Dart Programming
Now that you’ve mastered the basics of data and control flow, let’s delve into the real muscle of Dart programming: functions and classes. These are the tools that will allow you to build complex and organized applications.
Functions in Dart
Functions are blocks of code that perform a specific task. They help in organizing code, making it more modular and reusable. In Dart, you can define functions using the void keyword for functions that don’t return a value, and specify the return type for functions that do return a value. Here’s how you define a function in Dart,
// Function without parameters and return value
void sayHelloCodesick() {
    print('Hello, codesick!');
}

// Function with parameters and return value
int addCodesick(int a, int b) {
    return a + b;
}

// Function with optional parameters
void greetCodesick(String name, {String greeting = 'Hello'}) {
    print('$greeting, $name!');
}

// Function with optional positional parameters
void orderPizzaCodesick(String size, [List<String> toppings]) {
    print('Ordering a $size codesick pizza with ${toppings ?? ['cheese']}');
}
Classes in Dart
Classes are blueprints for creating objects. They encapsulate data for the object (attributes or properties) and the behaviors the object can perform (methods). Dart is an object-oriented language, so understanding classes is crucial. Here’s how you define a class in Dart,
// Class definition
class PersonCodesick {
    // Properties
    String name;
    int age;

    // Constructor
    PersonCodesick(this.name, this.age);

    // Method
    void greetCodesick() {
        print('Hello, my name is $name and I am $age years old, feeling codesick.');
    }
}

// Creating an instance of the Person class
var personCodesick = PersonCodesick('Alice', 30);

// Accessing properties and methods of the object
print(personCodesick.name); // Output: Alice
personCodesick.greetCodesick(); // Output: Hello, my name is Alice and I am 30 years old, feeling codesick.
Functions and classes work together seamlessly. You can call functions within methods, and objects can have their own unique functions.
Mastering these concepts unlocks the true potential of Dart programming, allowing you to build complex and well-structured applications.
Keep practicing and experimenting!
Table of Contents
What is Flutter?
Flutter is an open-source framework developed by Google for building beautiful, native-looking applications across multiple platforms.
What it does?
Cross-platform development: With Flutter, you write code once and use it across Android, iOS, web, Windows, macOS, and Linux. This cuts down on the time and effort needed to create separate apps for each platform.
Beautiful and performant UIs: Flutter employs its own rendering engine to create smooth animations and visually appealing interfaces, enhancing the user experience.
Rich widget library: Flutter offers a diverse selection of pre-built widgets for common UI elements like buttons, text fields, and menus, streamlining the app design process.
Hot reload: This nifty feature lets you instantly see changes to your code reflected in the app, without the need to rebuild or restart. It makes development faster and more iterative.
Who uses it?
Developers of all skill levels, from novices to seasoned professionals. Companies of all sizes, ranging from startups to big enterprises.
Some notable apps built with Flutter include Google Stadia, BMW Connected, and Reflectly.
Why Flutter is gaining popularity?
Flutter has become really popular lately for a few reasons,
Saves Time and Money
- You can make apps for Android, iOS, web, and desktop all at once, which is faster and cheaper than making separate apps for each.
Great User Experience
- Apps made with Flutter look and feel like they’re native (built for that platform) and they run smoothly.
- There are lots of ready-made parts (like buttons and menus) you can use to make your app look nice and work well.
- You can customize your app a lot to match your style or what your users want.
Easy for Developers
- You can see changes you make to your app right away, without restarting it, which makes it faster to build things.
- The programming language Flutter uses is pretty easy to learn, even if you’re new to coding.
- There’s a big community of people using Flutter, so you can get help and find tutorials easily.
Other Reasons It’s Popular
- More businesses want to make apps that work on different devices, and Flutter lets them do that easily.
- Google, who made Flutter, supports it a lot, which makes people trust it more.
- It’s good for making apps that will work on new kinds of devices, like ones with folding screens.
Even though there are other ways to make apps that work on different devices, Flutter is popular because it’s fast, easy, and lets you make beautiful apps.
Features and Advantages Overview
Flutter is a rapidly rising star in the app development world, attracting developers with its unique features and advantages. Here’s a quick breakdown:
Features
Cross-platform development, Build apps for Android, iOS, web, desktop (Windows, macOS, Linux) with a single codebase. Saves time, effort, and resources.
Hot reload, See changes to your code reflected instantly in the app without restarting. Speeds up development and iteration.
Stateful hot restart, Maintain app state during hot reloads, ideal for complex apps.
Customizable UI, Rich widget library for common elements, plus extensive customization options for unique designs.
High-performance rendering, Skia engine delivers smooth animations and native-like performance.
Declarative UI, Define the UI structure and Flutter handles rendering details.
Dart programming language, Easy to learn, even for beginners, with modern features and a clean syntax.
Large and active community, Extensive resources, tutorials, and support from fellow developers.
Advantages
Faster development, Cross-platform development, hot reload, and easy-to-use Dart language all contribute to faster development cycles.
Reduced costs, Building one codebase for multiple platforms saves resources and development expenses.
Beautiful and performant UIs, Skia engine and rich widget library enable stunning and responsive interfaces.
Flexible and customizable, Adaptable to various app types and design needs.
Future-proof, Supports emerging technologies like foldable devices.
Growing community, Access to a wealth of support and resources.
Overall, Flutter offers a compelling combination of features and advantages that make it an excellent choice for a wide range of app development projects. Its ease of use, flexibility, and performance are attracting developers of all levels, making it a major player in the future of app development.


-
 Python2 months ago
Getting Started with Python | A Beginner’s Guide
-
React.js2 months ago
Start Your React Journey | A Step-by-Step Guide.
-
React.js2 months ago
How to Use Props in React for beginners
-
React.js2 months ago
React with Express JS | Understanding the Basics
-
React.js2 months ago
ReactJS State | SetState, Props and State Explained for beginners
-
React.js2 months ago
ReactJS Components | Type, Nesting, and Lifecycle for beginners
-
React.js2 months ago
React With Redux | Understanding the Basics
-
Flutter1 month ago
Introduction to Flutter | Flutter tutorial for beginners